
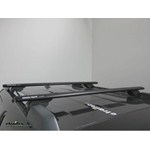
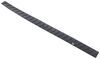
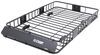
Rhino-Rack SX Series Legs for Vortex Aero Crossbars - Raised Factory Side Rails - Qty 4
(334 reviews)
Price: $166.95
In Stock

Rhino-Rack SX Series Legs for Vortex Aero Crossbars - Raised Factory Side Rails - Qty 4
Item # RRSX009
Retail:$315.99
Our Price: $166.95
You Save: $149.04
In Stock

Thank you! Your comment has been submitted successfully. You should be able to view your question/comment here within a few days.
Error submitting comment. Please try again momentarily.


- All Info
- Reviews (334)
- Q & A (0)
- Videos (4)
- Photos
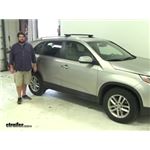
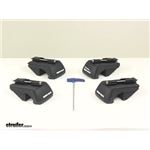
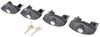
Rhino Rack Roof Rack - RRSX009
- Feet
- 4 Pack
- Rhino Rack
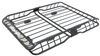
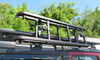
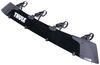
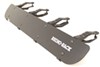
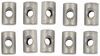
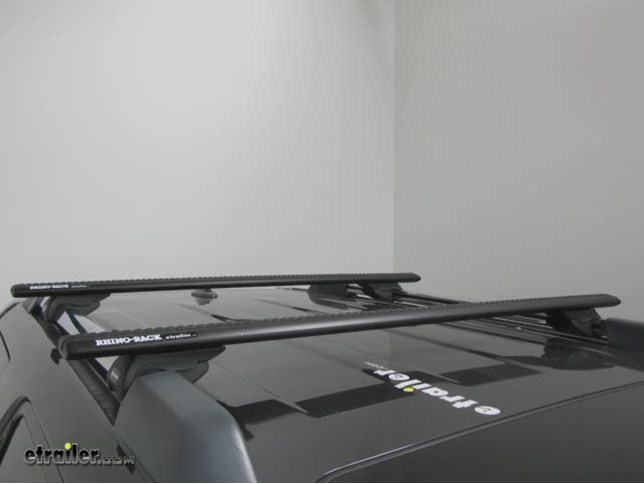
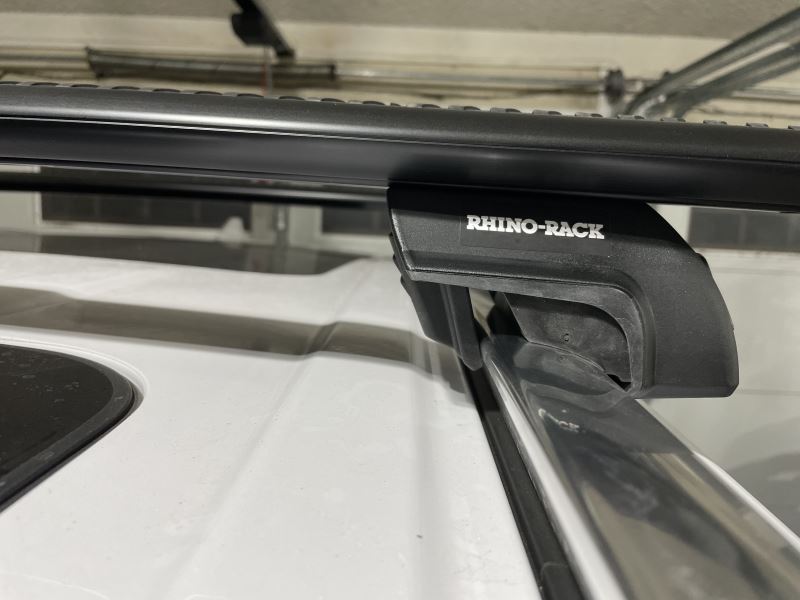
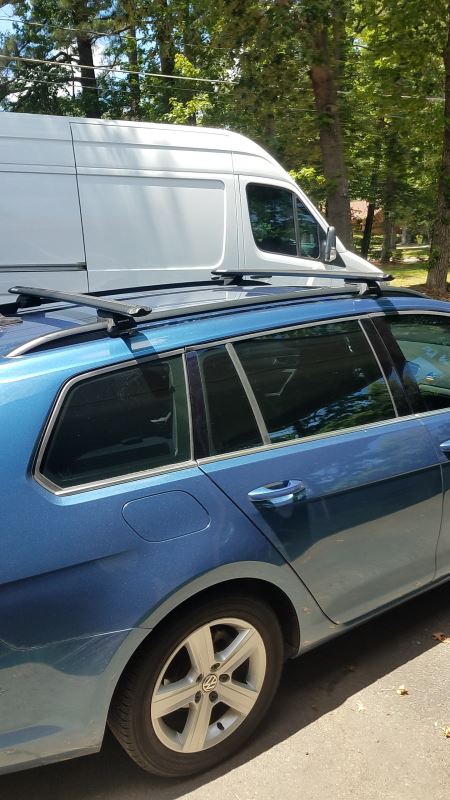
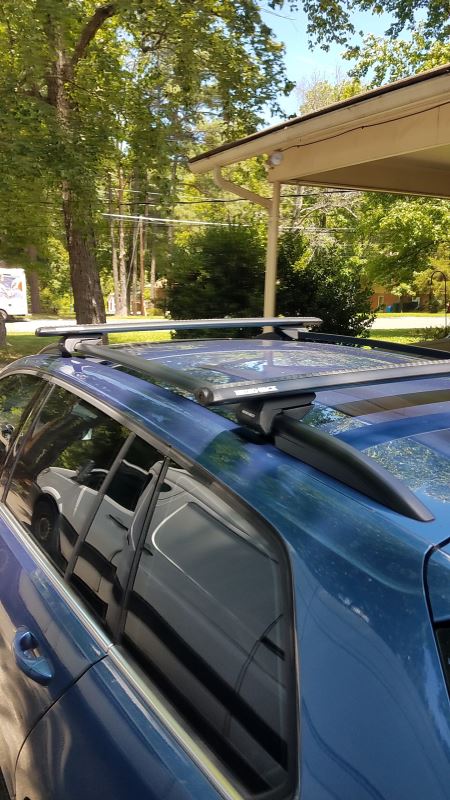
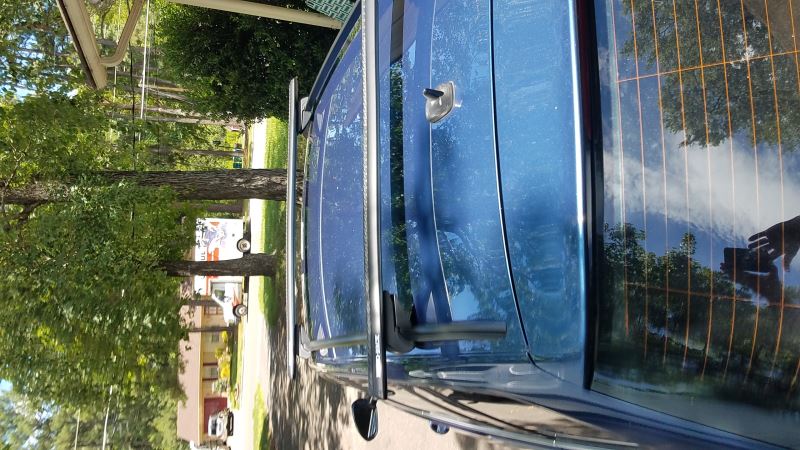
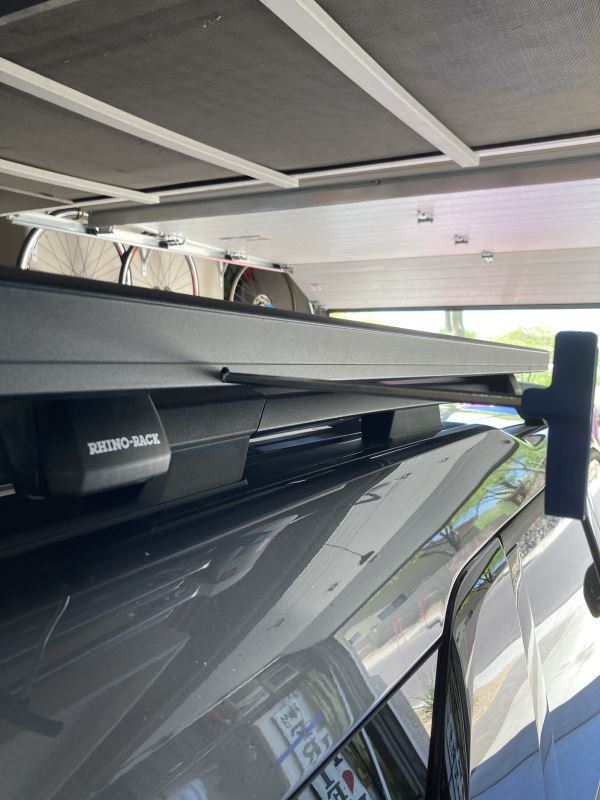
Durable nylon legs let you mount Vortex Aero crossbars to your vehicle's factory elevated side rails. Custom-fit leg clamps tighten with included tool for easy installation on your rails. Pair with 2 crossbars to create a complete roof rack.
Features:
- 4 Legs let you mount Rhino-Rack Vortex Aero crossbars on your vehicle's factory raised side rails
- Pair with 2 crossbars (sold separately) to create a complete roof rack
- Easy installation - simply tighten leg clamps on rails with included tool
- Rubber pads on clamps securely grip your side rails
- UV-stabilized, glass-reinforced nylon is durable and weather resistant
Specs:
- Quantity: 4 legs
- Weight capacity: 220 lbs
- Always observe your vehicle's maximum roof load capacity
- 5-Year limited warranty
SX009 Rhino Rack SX Leg Kit for Vortex Aero Cross Bars - Elevated Rails - Qty 4
Installation Details


Video of Rhino-Rack SX Series Legs for Vortex Aero Crossbars - Raised Factory Side Rails - Qty 4

Videos are provided as a guide only. Refer to manufacturer installation instructions and specs for complete information.


Video Transcript for Rhino Rack Vortex Aero Roof Rack Review
Today we're going to be taking a look at the Rhino Rack Vortex Aero Crossbar Roof Rack System. These are available in a variety of lengths and are available in black and silver. We're going to be using this with the Rhino Rack Vortex Aero Leg Kit for raised factory side rails. These are also available in a variety of different sizes. To see which ones are going to fit your vehicle please refer to etrailer.com. One of the great things about having a roof rack system is the ability to carry cargo on top of your roof without having to take up any additional space inside of your vehicle. To build a roof rack system you're going to need a set of crossbars and you're going to need the leg kits that are going to be best suited for your vehicle and your application. Let's go over a few features that make this roof rack system a great system for you.
They're going to be very stylish. They're aero dynamic so it's going to allow you to build a crossbar roof rack system that's going to offer you a stylish and quiet ride. Each bar features vortex strips in the bars top C channel. They're going to feature molded ridges. That's going to help disrupt the air flow and it's really going to help reduce the drag and wind noise. A few other great features about having those strips in there is it's going to help keep out dirt and dust out of your crossbars.
It's also going to provide some cushion for your gear and provide slip resistance. These versatile bars are going to work with channel mounted and wrap around carriers and accessories. Here on the end we have an end cap that includes a pull down tab that's going to provide easy access to the crossbar channel. When using clamp on accessories they simply wrap around your crossbar. The Vortex Aero Bars feature channels in the bottom of each bar. That's going to allow for easy installation of your Rhino Rack Roof Rack Leg Kit.
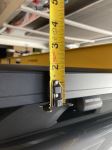
This system also comes with rulers that place in the bottom channels. It's going to help ensure that your crossbars are centered on your roof. It's also going to help reduce drag and wind noise. The Leg Kit is available with the crossbars or they can be sold separately to help build and complete a roof rack system. The Vortex Aero Leg Kit has some really great features about it.
This part here is going to slide into the channel on the underside of your crossbar. The bolt is actually going to be located on the inside of your crossbar so you will need to remove your end cap. That can be a great feature to help hide that out of the way. Then on the underside we have the pads that are going to fit nicely around our raised side rails. You can see how they have ridges as well as this side has a lip to kind or curl around the outer part of the side rail to provide a nice, secure grip. Those ridges are going to keep the foot pack or the leg kit from being able to slide back and forth on your side rail. It also comes with a special tool. This is a tensioning tool that's going to be used to tighten up the leg kit around your side rail. It has a nice arc to the handle. Once you have the leg kit tight enough around your side rail, this is actually going to straighten up, assuring you that everything is tight enough. We went ahead and assembled three of our legs to our crossbars but we do want to show you how to assemble the last one. Really simple, quick installation. All you need to do is remove the end cap, turn your foot upside down, and it's going to slide right into place into that channel on the underside of your cross bar. Replace your end cap. Now we're set to adjust them to fit the width of our side rails and then we can get them secured onto our roof. We're going to take our front cross bar and place it onto the front portion of our roof rack here on our side rails. When installing this you will want to make sure that the leg kits are straight across from each other. This can be done by finding a fixed point on your side rails and simply taking a measurement back to the closest point of your leg kit. Now we'll take our rear bar and place it onto our side rails. With everything in place we'll go ahead and get it set and make our adjustments, take our measurements and get everything tightened down. To ensure that our rear legs are straight across from each other we can simply just take a measurement from the center of our front bar to the center of our rear bar. In the instructions it states that we need to have a measurement somewhere between 27-9/16" to 31-1/2". For our demonstration today we're going to set them at 30". We'll do this on both sides to ensure the legs are straight across and that our bars are parallel with one another. Before we tighten everything down we do want to make sure that the gasket here is facing outward and not tucked under the leg. When pressure is applied the gasket is going to create a nice seal between the leg and the side rail. Also we need to make sure that we have even bar overhang on each side. This can be done simply by taking a measurement. We'll do this measurement on both sides, once again to ensure that we have even bar overhang on each side of our vehicle. We'll do it for both the front and the rear. Now we'll remove the end caps and then we can tighten everything down. We'll place the tool inside the cross bar and then we can simply turn it in a clockwise direction to tighten up the Allen bolt which is going to secure our leg around our side rail. One of the great things about this system and this tensioning tool is the lever is going to straighten out to let us know we have everything tight enough around our side rail. We'll want to repeat the same tightening process for each leg. For each bar we're going to have to take four measurements. This is so we can install our measuring stick. Two measurements per side. Feel out for the opening of the C channel underneath, place our tape measure to the back of the leg. For our application today it looks like we're going to take about 3" of that measuring stick to cut out and place in our back part. We'll do another measurement here toward the outer point. That measurement is going to be right at 3". If you have the bar set up evenly, then that measurement should be identical for the other side of the rear bar. If you want to double check it doesn't hurt to take more measurements on the other wide. We'll take our measuring tape and place it over our strip. The strip does have measuring increments on there that you can use as well, but since we used the measuring tape we're just going to go ahead and get that exact measurement that we need. Then we'll mark it so I know that I need to make a cut at #70. Simply take a pair of scissors and just cut that strip. Now we'll take our other measurement and I'm going to need one at mark #100, or #140. I'll cut there. Now we'll take the strip that we just cut, place it into our channel and we'll just slide it back in place. It's a pretty good fit so we'll fit our other piece on the inside. We're not going to be able to slide this one into place but you can feel around and you can simply just push it through the channel. We have it pushed in there, now we can slide it into place and we're set to go. We'll repeat this process for the other three legs. With everything tight and secure and our measure strips installed we can install our end caps and then we can take this out on the road and show you how it performs. This roof rack system does have a maximum load capacity so you do want to make sure that you refer to your vehicle manufacturer's handbook for maximum roof load capacity. You'll want to always use the lower of the two figures. These bars come in a variety of lengths. They come in 41", 44", 49", 54", 59", 65" and 71" bars. Each bar is going to measure 3-1/8" in width and it's going to measure 1-13/64" tall. The Rhino Rack Vortex Aero Bars all come with limited lifetime warranties. All of the feet for Vortex Aero Bars for factory raised side rails come with limited lifetime warranties as well. You can also equip your cross bars with locking end caps. Those are sold separately with part number RRVA-LEC4. Now we're out on the road and we do not have our crossbar system installed. When we take a look at our decibel meter you will see that with a naked roof it's peaking out at anywhere between 70 and 72. We'll go to compare that with our roof rack system installed and you can see that it only adds about one decibel with the roof rack system installed, peaking out from 71 to 73. That's going to do it for today's look at the Rhino Rack Vortex Aero Roof Rack System for Raised Factory Side Rails. .
Customer Satisfaction Score:
87% were satisfied with this product
13% of customers were not satisfied
- Wrong item was ordered
Customer Reviews
Rhino-Rack SX Series Legs for Vortex Aero Crossbars - Raised Factory Side Rails - Qty 4 - RRSX009
Average Customer Rating: 4.7 out of 5 stars (334 Customer Reviews)
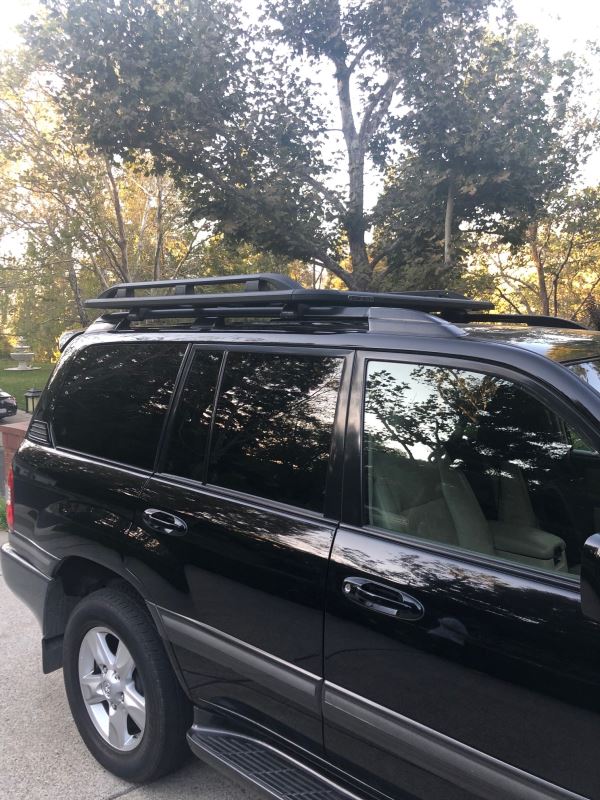
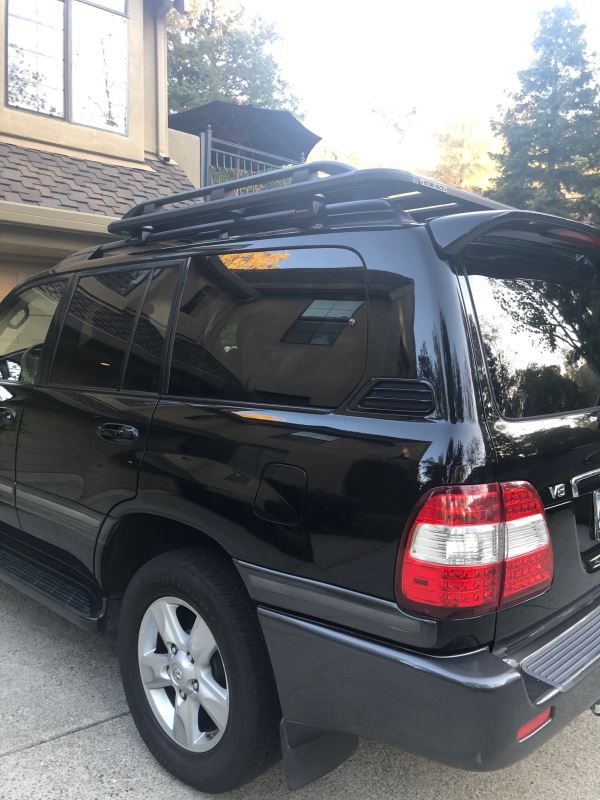
Durable nylon legs let you mount Vortex Aero crossbars to your vehicle's factory elevated side rails. Custom-fit leg clamps tighten with included tool for easy installation on your rails. Pair with 2 crossbars to create a complete roof rack.by: Greg06/25/2020
The parts were simple to install. The foam padding did drop out as I manipulated the parts, so being aware of its placement during installation was important.
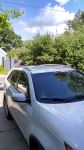
The neat, clean appearance of the items provides a nice look for my 2012 Kia Sorento.


by: Lawrence 02/22/2024
Exactly what my car needed, when other places tried to sell me a drill/bolt solution - fit, solid, no wiggle.
by: John S.08/22/2016
Quality product. Well designed and installed without a problem.
by: Richard11/12/2022
Package, both items appeared used, but in good condition. The legs were not in the factory box, but just a eTrailer box. The instructions were hard to follow, even with a little help from YouTube. Just about to test drive to check the noise level. Time will tell, there is soft rubber on the legs and it may be wise to remove these when not in use, especially during Florida summers.


by: Sean07/06/2023
Rhino rack products are superior and I prefer them over Yakima or Thule.
However, I would like eTrailer to know, and to warn other customers that over the years the items I order from them always come with cosmetic damage or missing parts due to insufficient packaging.
In this case, my Vortex bars were shipped in the retail box which had opened in transit so two of the end caps escaped and are who knows where. Under a conveyor belt line in some UPS building or in one of their trucks somewhere.
This is not an issue as these end caps I intended to dispose of replacing them with the locking end caps I ordered with my bars and towers.
etrailer, I do not need resolution for this issue but your track record with packaging and shipping is sub par. Please step up your game so your customers receive complete orders.


by: James12/01/2022
I haven’t installed rack yet and everything appears to be in order.
* I wasn’t anticipating that Rhino -Rack Sports Ladder Peg (s602) be made of plastic.
Does it have the strength, durability to perform well and not get brittle in colder temps?
by: Tyrone Guy04/26/2024
Awesome parts. Strong grip and kudos on the rubber flares for the seal.


by: Canary Ranch04/19/2020
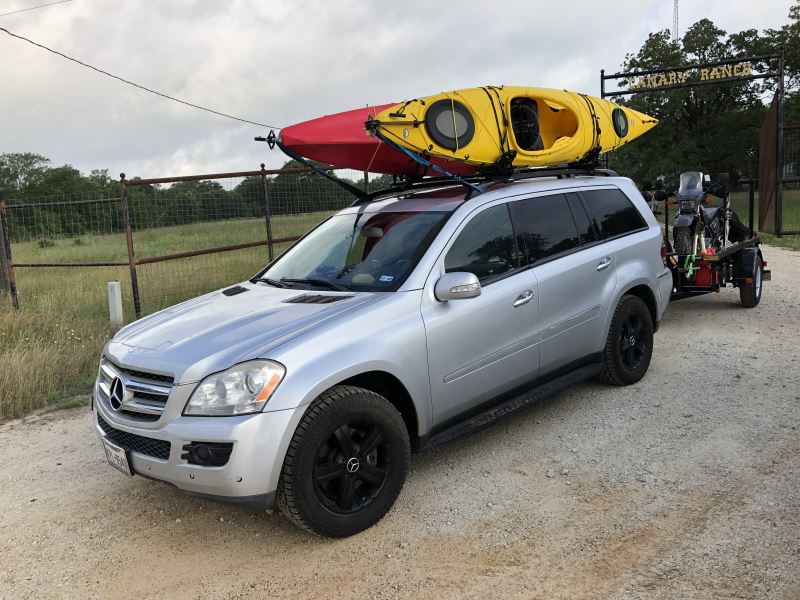
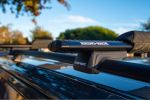
Using Rhino-Rack Vortex Aero Crossbars, Using Rhino Kayak holders. Also use a Rhino bicycle rear receiver mount. Love Rhino products.....strong, well engineered, low noise, and every part is quality... mounts, straps, etc. Photo is departure picture from last years trip to Big Bend, Texas. We probably put a couple thousand miles on these pieces of Rhino equipment on all types of roads at both Big Bend Park and Big Bend State Park... You really cannot go wrong buying Rhino products. Everything they make is well designed and will not disappoint.

by: Keenan02/23/2024
I bought these for my 2013 Rav4 primarily to transport wood from home depot. Getting the bars safely installed and latched onto the cars longitudinal bars was pretty simple. The problem was the whistling. The cross-bars having a tee slot will whistle if you don't properly cut and install the 2 types of rubber/plastic tee-slot blocks provided. There is a slot block for the top, and for the bottom. The top one is easy to install since it is just one piece, but the bottom one requires 4 piece of this tee-slot block (2 outer pieces and 2 inner pieces. It took me a while to get the bottom blocks installed, quite a bit of measure, test cut, check, remeasure, cut, insert, recut yada yada.
Once I thought I had everything right, I could still hear whistling on the freeway and had to re-cut some better fitting bottom slot blocks. It turns out the more you tighten the legs, the more of the tee slot is exposed, and you need to have more of the tee-slot block. Having looked at some of the equpipment you can attach to the top of these tee-slot racks, I don't see why the bottom tee slot is even necessary.
Anyway, once installed (properly), these bars work great. I can transport wood Lol
by: Diy09/11/2021
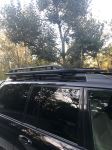
The instructions is missing the detail about pushing the adjustable leg (the one that grabs the inside of the rail) up toward the top of the leg before sliding the whole leg into the bar’s end. Once you get the idea, it was extremely easy to install. This set up seems to be a universal fit, not specific vehicle. The adjustable plate looks short and only contact about 1/2 in on the inside wall of the flush rail (see pic). I understand that once the whole assembly of 2 legs and the bar is in place it’s rigid and the outside grip on the rail is more important. But I think Rhino-rack could easily make that single part a vehicle specific (longer for the Telluride) to add more security, or at least for the look. I’d like to hear opinions on this from Rhino-rack or etrailer.

by: Harold12/14/2023
This rating is not for the product and solely on the practices of ETrailer. ETrailer erred and did not ship this product when they confirmed and when called to check the status charged me an additional $xx plus for overnight shipping in order that I have the product in time for our trip. 2 of the 3 parts of this order did arrive on time and in good shape, but the fact that Etrailer charged me additional for their shipping error does not sit well with me at all and I would never recommend the company to friends.
by: Steven 02/06/2024
Very well made rack components, and fast shipping from etrailer. However, I will comment that when I entered the year, make, and model of my vehicle on their website, this Rhino-Rack component did not show up as a compatible part. I also sent a message to etrailer before ordering the parts to ask if they might work with my car. They responded saying that these parts are not designed to fit my vehicle. I decided to order them anyway, as I only needed a set of 2 rack legs, and not a full set of 4. The rack pieces actually fit my vehicle perfectly and are quite secure. I believe that these SX series legs are a more "generic" part that would fit quite a lot of vehicles with raised factory side rails.
by: Steven P04/30/2020
Its been one year since I installed the Rhino Rack crossbars and I have absolutely no issues. The main use is to carry my Kayaks on my 2013 Subaru Impreza utilizing Yakima JayLow kayak carriers. The only caveat is to be sure to properly cut and install the plastic channel inserts (underside) or you will experience an annoying whistling sound. If you're looking for high quality crossbars, I highly recommend these.


by: John12/06/2021
Just what I was looking for for my 2021 MB Metris Cargo Van with Raised Rails, for hauling a 14-foot SUP. I wanted as low profile as possible and the Rhino Rack SX Series Legs and Aero Crossbars looked best. Relatively easy to set up.

by: Bob04/12/2022
Not my first purchase from etrailer, and it won’t be my last. The research and purchase experiences are second to none.
The racks are just as expected from Rhino Rack. They got here quick, installed in 10-15 minutes, and look great. They easily support my RTT and myself after a big dinner. Excellent quality.
Although, my sticker was messed up! So there. That’s the one con.


by: Kate, OR02/09/2019
I am very pleased with the etrailer.com. Easy to navigate website and expedited shipping for no extra cost. I ordered and received my product in about a week, which is very reasonable for being across the country.
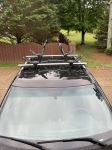
The product arrived in tact and with no damage. Easy to put the rack bars on my jeep. I've included pictures of the completed result. We plan on buying the attachments that will mount our bikes and when we do we will be doing so from etrailer.


by: Brian06/01/2022
I purchased the Rhino legs, cross bars and J-style kaya carriers together and could not be more pleased with the combination. The system was installed in an evening and used the next day. The legs were very simple to install on the cross bars and then mount on the vehicle.


by: Wendy10/31/2020
These feet worked like a charm! We were able to use these to install the Rhino Pioneer Rack onto our existing factory rack (2007 Toyota Land Cruiser). Adam at etrailer.com was awesome!

by: Michael06/23/2020
Made really nice. Instructions were easy to follow. At first I read all of the reviews for this model of rack. The only complaint was the whistle you get after the install. I experienced the exact same thing, however I did use the the "cross under bar strip" after my initial test. Took it back out, and there is no wind noise at all. This rack is awesome, and well worth the price.


by: Kimberli S. 07/16/2019
I spent a week reading reviews and forums to find the right one for my 2019 Jeep Cherokee that I just bought a few weeks ago. I just have to overthink everything but it paid off. I just received them this morning and installed them myself! First time for everything! It was really easy. The only part that was frustrating was the very first part... sliding the rubber pieces into the crossbars. They would not slide very well so I ended up using a bit of oil to make them slide better. Other than that, installation was easy and quick. I LOVE the looks of them. Very gorgeous!!! Thank you so much!! Very happy with the end result!!


by: Dakota05/01/2022
Exactly what I needed to replace the factory cross bars to make it easier to take off my roof top tent. Easy to install and secured nicely to the factory rails.


by: Herb12/19/2023
Great product except it scratches the drip channel on the roof. Would recommend.
by: Amy11/17/2023
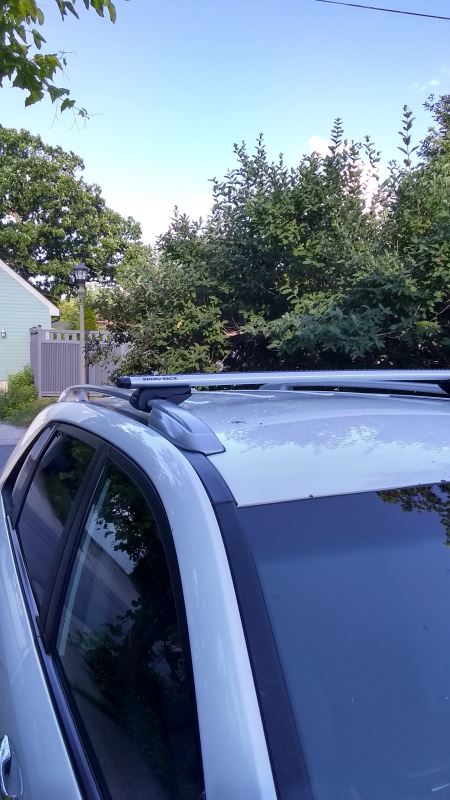
These were a lot easier to install than I thought they'd be. We've had them on our KIA Telluride from coast to coast now. They're sturdy. I haven't had to tighten them or anything and we were not going easy on the luggage rack.
by: Dan R.04/30/2021
Easy to install on the Bronco Sport factory roof rails allowing for a very low install height for the Pioneer platform!


by: Nathan11/12/2023
I would have given 5 stars except that upon delivery the boxes with the cross bars in them both had open ends and the bars were sliding out. Also the box containing the leg supports had a huge hole punched in the top. So I had to quickly do an inventory to make sure all the bits and pieces were still present and to check for any damage. Fortunately all was good, but I honestly don’t know how. I was lucky. Your shipping department needs a do better slip in the way they package things together. Otherwise great price, and Rhino-Rack I already knew was a highly rated product.
25
333
Show More Reviews
See what our Experts say about this Rhino Rack Roof Rack
- Can Older Rhino Rack SX Series Legs Fit on a 2021 Subaru AscentYes. The Rhino Rack Series SX legs like the # RRSX009 are designed for raised factory side rails like the ones on your 2021 Subaru Ascent, so they will work just fine for you. I'm not seeing a 51" long Vortex Aero crossbar available and the closest size is 49" # RRVA126B-2, which are likely going to be a little bit too short to have the bars sit outside of the towers as this kit was designed. You can test it out to see how your old bars fit but you're likely going to want to replace them...
view full answer... - Will The Rhino-Rack SX Series Legs Fit The Raised Rails Of A 2023 Ford Expedition MaxI spoke with Rhino-Rack and was informed that the SX series legs # RRSX009 would not be compatible with the raised rails on your 2023 Ford Expedition. You would instead need fixed point legs like the # RRRCL4 and base kit # RR86QT in order to mount your Vortex Aero crossbars.
view full answer... - What Is the Roof Weight Capacity for a 2014 Kia Sorento If you take a look on page 4-157 of the owner's manual for a 2014 Kia Sorento, you will see the weight capacity of the "roof rack" is 220 lbs. There is not a listed weight capacity of the side rails as they are not really designed to directly hold a load but rather the actual crossbars attached to them. I have personally never seen a rating for both the crossbars and the side rails, it is always the roof rack which is composed of both the crossbars and the side rails. That said, if you...
view full answer...
Do you have a question about this Roof Rack?
Info for this part was:

Video by:
Andrew K

Video by:
Zach D

Edited by:
Tyler C

Video Edited:
Jacob T

Installed by:
Cole B

Written by:
Brian B

Updated by:
Hannah L

Updated by:
Alex H

Updated by:
Michael B

Updated by:
Carrie F
At etrailer.com we provide the best information available about the products we sell. We take the quality of our information seriously so that you can get the right part the first time. Let us know if anything is missing or if you have any questions.
Product Experts Available Now!
Call 1-800-940-8924
Greg
6/28/2021
Great! I put the canoe on these racks and travel with confidence. The stock racks these replaced were nowhere near this strong and useful. We just returned from northern Wisconsin carrying two kayaks with Malone j-racks, which I install on the Rhino rack in a few minutes, and those boats were solid and safe the whole trip. Great addition to my vehicle!